 |
| Cora enjoying a yogurt parfait with fresh blueberries & granola |
If your family eats a lot of yogurt like mine does, then chances are you've noticed how expensive it has gotten in the stores lately. We used to buy the individual cartons, but for economical reasons have switched to the 32-ounce tubs instead. Still, yogurt isn't cheap.
But after finding a simple recipe for homemade yogurt that doesn't require purchasing a yogurt maker, I started making my own. I have been making our family's yogurt for over two years now and have found it to be very cost-effective, easy, & delicious. Plus, I like that I can control the ingredients including sugars and preservatives.
Yogurt-making may sound intimidating, but, honestly, if you have a slow cooker, then you're all set!
What You Need
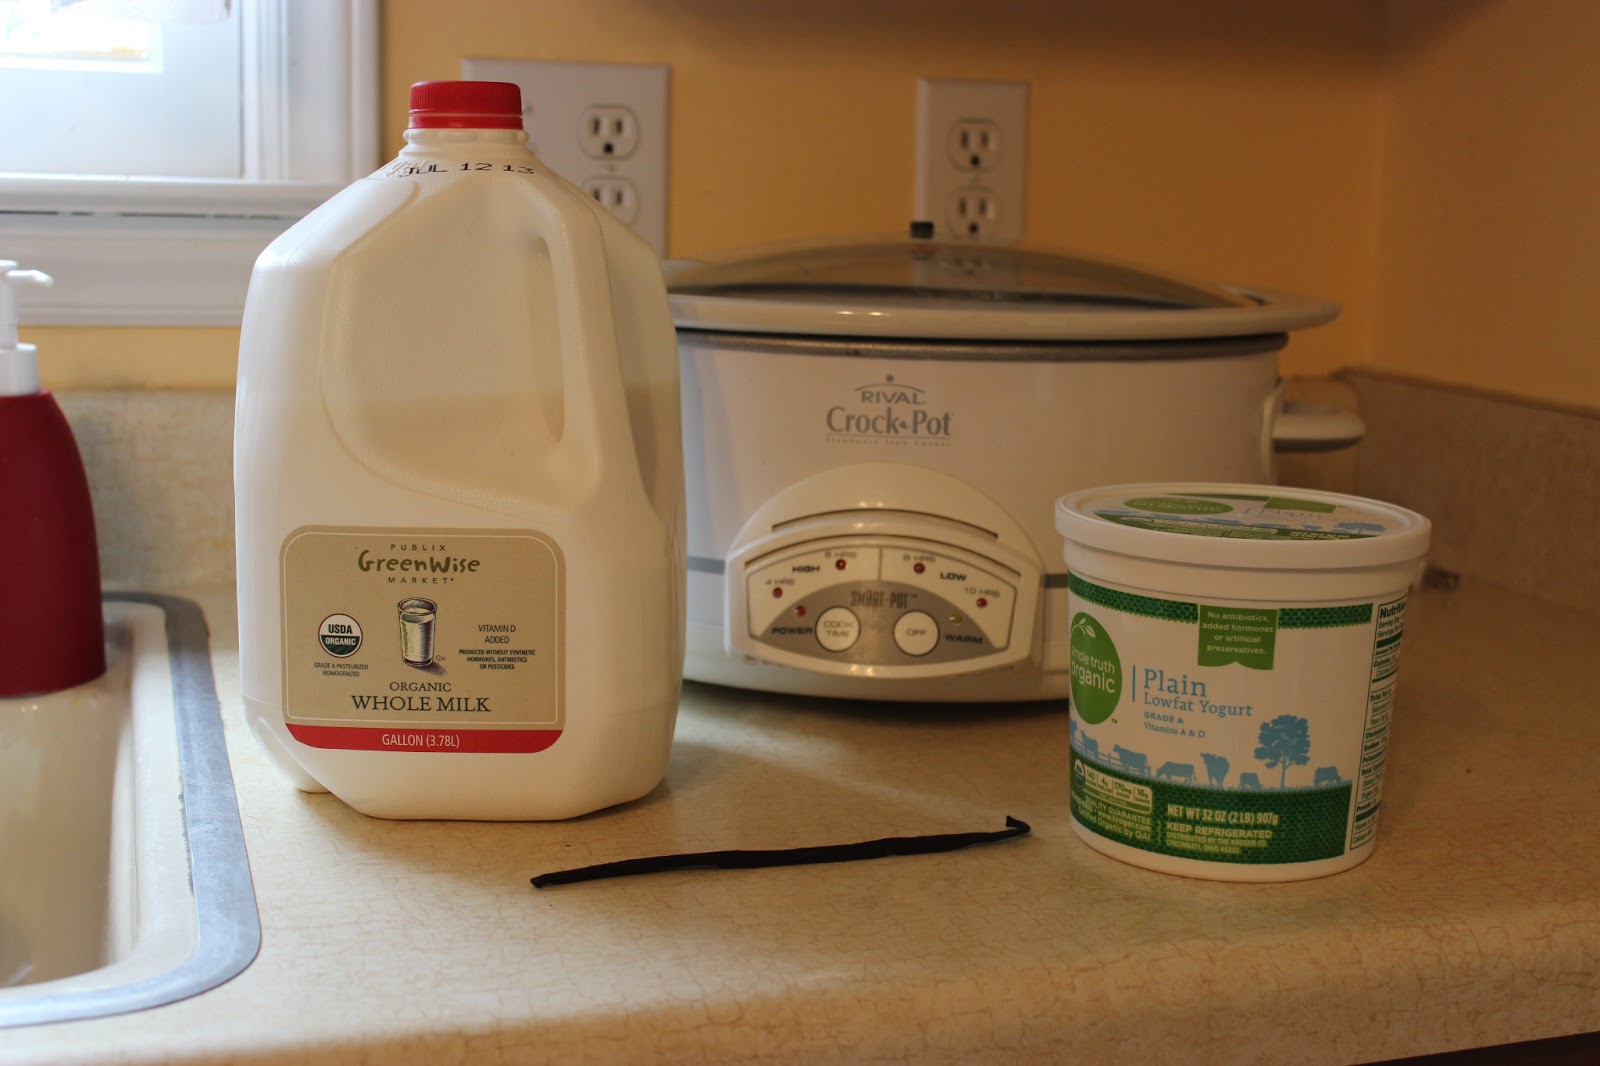 |
| The Cast of Characters: A 4-Man Show |
- 1/2 gallon pasteurized milk*
- 1/2 cup plain yogurt, with live/active cultures (check label)
- 1/4 cup nonfat dry milk or 1 packet plain gelatin (optional-to use as a thickener)
- vanilla bean (optional-for flavoring)
- 4-quart or 6-quart slow cooker
- 2-3 large bath towels to wrap slow cooker in
 |
| Grade A Pasteurized Homogenized Milk |
Directions
1. Pour milk into your slow cooker. You can also scrape in some vanilla bean for extra flavor if you want. Turn the slow cooker on the lowest setting, cover, and cook for 2 1/2 hours.
 |
| Bubbly Milky Goodness |
 |
| Remember: Use the lowest setting |
2. Turn slow cooker off. Unplug, and let sit for 3 hours.
 |
| And...it's off! |
3. After 3 hours, add 1/2 cup yogurt and any thickener you like (if you want). (I have used nonfat dried milk in the past, but currently, I don't use any thickeners.) Whisk everything together thoroughly and return lid to slow cooker.
 |
| Yes, that's a 1/2 cup measuring cup |
4. Wrap your cooker in towels to hold in the heat. Let yogurt set for 8 hours or overnight.
 |
| My girls' princess towel |
5. After 8 hours, your yogurt is ready to eat! You will find that it is not as thick as some store-bought yogurt, but if you like it plain, it's ready.
 |
| See those black specks? That's vanilla bean. |
However, if you want your yogurt a little thicker, you can strain it using a colander lined with cheese cloth or ultra-absorbent paper towels over a larger bowl.
 |
| For thicker yogurt, just strain it. |
Put the yogurt in the refrigerator while it strains; you can strain for as long as you want. The longer it strains, the thicker your yogurt will be. My husband likes his the consistency of Greek yogurt, so sometimes I will strain it for 6-12 hours.
Note: One batch of unstrained homemade yogurt yields a little over two 32-oz. containers. However, if you strain your yogurt for 6-12 hours, you may only make 32 ounces.
 |
| 2 Dannon 32-ounce tubs replaced with homemade organic yogurt |
6. Once your yogurt is ready, you can add your own flavorings and sweeteners to it. Sometimes I will keep one tub plain to use in place of sour cream or in recipes. Then, I will add agave, honey, or raw sugar to the other container of yogurt.
 |
| I like mine with cinnamon & honey. |
You can add whatever you have on hand and control how sweet you make your yogurt. That is the beauty of cooking from scratch.
Helpful Hint
Start yogurt-making in the afternoon, say around 2:00 or 3:00, so that you don't have to stay up late to complete Steps 3 & 4 and so you will have fresh homemade yogurt waiting for you when you wake up! : )
 |
| Even the baby loves her yogurt! |
Wasn't that easy? If I can do it, so can you! Why don't you give yogurt-making a try?

Linking up to these lovely parties.
If you would like to have posts delivered to your inbox, click: Growing in His Glory. Or join us on Google Friend Connect, Facebook, Twitter, & Pinterest.
Thank you so much for this post! I have been thinking about trying to make yogurt, but didn't have the yogurt maker and was scared I'd screw it up! You make it look so easy, I think I'll give it a go!
ReplyDeletethanks a lot!!!!!
ReplyDeleteThis is the easiest yogurt recipe ever! I buy the plain 32oz containers and then mix in a little bit of fruit preserves. But this is so cool! Do you think it would work if I added vanilla extract instead?
ReplyDeleteYummy! Fruit preserves sounds good, Jillian.
DeleteI have added vanilla extract AFTER I've cooked the yogurt. I'm not sure that it would hurt to add during the cooking stage, but my fear is that since vanilla extract is mostly alcohol, it might kill some of the live/active cultures. I have had good success adding vanilla to the finished product though and it was good.
If you try it out, let me know :)
Oooh I want to try this!
ReplyDeleteYou should! It's so easy and delish! You will not want to eat store-bought yogurt again, or says my husband :)
DeleteI haven't done this in a while, so maybe I'll make some when I get home from vacation next week. I sometimes use vanilla yogurt as my starter, and often use flavored gelatin instead of plain. I think I even once used pudding powder as a thickener. http://virginiaknowles.blogspot.com/2010/12/crockpot-yogurt.html
ReplyDeleteYes, you can use any flavor yogurt as a starter. I used a blueberry Greek once and the subtle hint of blueberry was amazing!
DeleteI've never tried flavored gelatin but I think it would be good.
I have used pudding powder as a thickener. It worked like dry milk to me. I don't use thickeners any more, just to cut down on costs and because they aren't so healthy. Plus they didn't thicken enough for my liking. Straining definitely works best to me. But that's the beauty of making your own yogurt. You can do whatever you like!
I've always wanted to try this, thanks for sharing!
ReplyDeleteYou're welcome, Lisa. I hope you like it!
DeleteThank you so much for sharing this. Honestly when I saw the title, I was about to right this off for me...but you made it look so easy! I'm definitely going to try it!
ReplyDeleteThanks again, for sharing!
Can't wait to try this one! I'm featuring this as one of my favorite links from last week's pin-it party. Make sure you stop by and link-up again this week!
ReplyDeleteThanks, Gabby! I'm honored!
Delete